Emulate Web View Documentation
Introduction
With Emulate's Web View, retailers can offer their customers an easy to use, mobile-friendly means to connect their EVs, chargers, and other devices to the Emulate service and implement spot price optimization according to their needs.
The Emulate Web View can be used as a long-term solution, or as an intermediate solution while a retailer integrates the Emulate service in their web or mobile applications via Emulate APIs.
Access to the Emulate service via the Web View
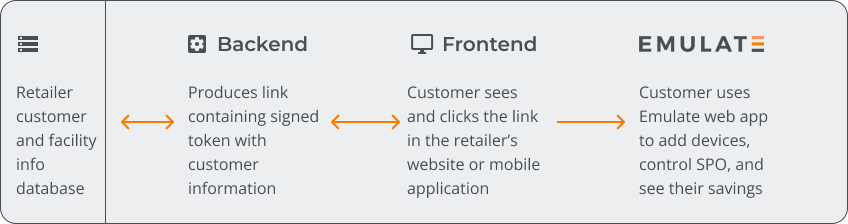
To provide their customers with access to Emulate services, the retailer adds a link to the Emulate Web View in their customer portal and/or mobile application. This link includes a token containing basic information about the customer and their facilities. The Emulate Web View uses the information in the token to identify the customer, enabling them to add devices, configure spot price optimization, and learn about consumption and savings. The customer can access only their devices and spot price optimization settings.
Replace TOKEN with the actual token generated for the customer
Replace TOKEN with the actual token generated for the customer
Troubleshooting
If the Emulate Web View fails to load, press F12 to open the developer tools and check the following:
- The JWT payload contains all the required data. Check the error message for indications of what needs to be fixed.
- The token is generated properly. If the token is incorrect, it usually results in an HTTP 401 error. Verify the following:
Custom branding of the Emulate Web View
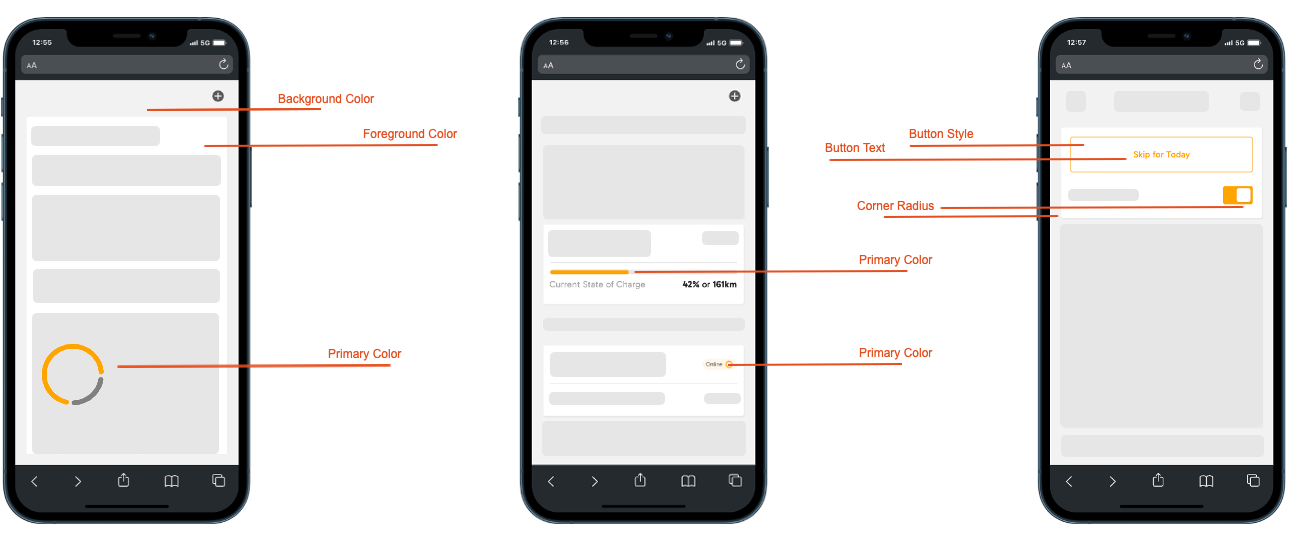
You can apply your name, fonts, and colors to the Emulate web application to create a branded user interface.
The branding settings need to be applied separately in the staging and production environments. Therefore, you can experiment with changes in the staging environment and only apply the finally approved version to the production environment that customers use.
To change the branding settings in the Emulate Web View:
- Log in to the stage environment or production environment.
- Navigate to API Settings and open the Customer Web View tab.
- Use the form to change the branding.
- Click Save to apply your changes.
Integration in a mobile application
To create a good user experience, make sure that the navigation of the mobile application and any standard header/footer used throughout the mobile application is still visible, and that the web view is placed in the content area of the page. Do not open the web view in the browser or in a pop-up window.
